OVERVIEW
Level: BEGINNER |
The bouncing box is an important next step in the progression of our animation skills. Using the box, we can begin to practice seeing and manipulating 3D forms. We can also use the box to practice the animation principle of ‘anticipation’!

#004: How To Animate A Bouncing Box In Adobe Flash – Resource Files
£3.99WHY A BOUNCING BOX?
Up until now, we’ve been animating using a simple, circular mass – the bouncing ball. It’s a simple object to build up a strong foundational knowledge of the principles of animation. However, to take things a step further and without jumping into the deep end of animating complex masses like humanoid characters, the bouncing box is a great tool to use.
It’s got distinct top, bottom, front, back and sides meaning we can begin to practice seeing and manipulating specific 3D volumes. The goal is to manipulate them whilst retaining the volume. Slightly easier if you’re using 3D computer animation or stop-motion but nonetheless a skill beneficial to all animators. Additionally, intentionally bouncing the box from one position to another, allows us to practice yet another important principle of animation: anticipation.
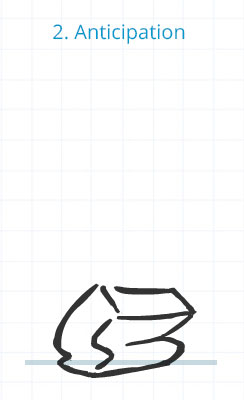
Anticipation is simply showing the audience what the object or character is about to do before they do it. Is usually entails moving a few frames in the opposite direction before moving in the direction of the intended path of action. In this case, our box is going to bend down before he jumps up. Besides the ’cause and effect’ of things, anticipation will add clarity to your work. Again, with many of the principles, this may sound childishly obvious. However, if you practice consciously applying this in broad movements you’ll more likely apply it to greater effect and clarity in more subtle gestures.
For now, let’s put this principle of anticipation and the other animation principles we’ve looked at into context. We’ll do this by going step-by-step through an effective methodology for constructing an animation like this.
BUILDING THE BOUNCE
KEYPOSES
When creating an animation, I prefer to work ‘pose-to-pose’ – another animation principle that’ll we’ll distinguish in a later tutorial later. For now, the distinguishing feature of this methodology is to figure out what your key poses are going to be.
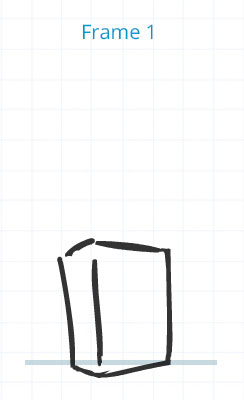
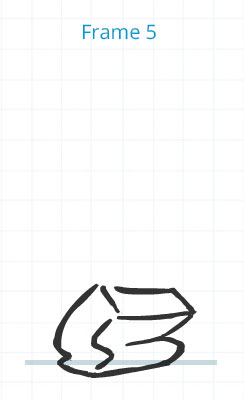
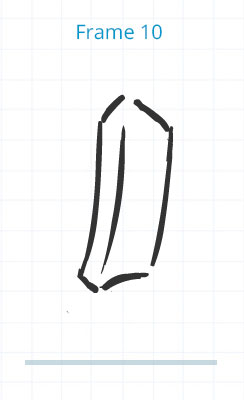
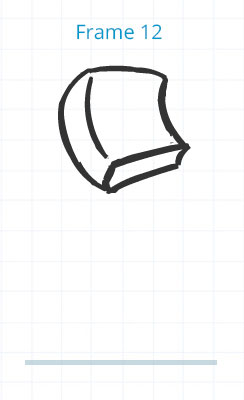
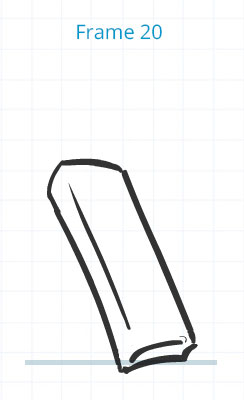
I like to think of key poses as the storytelling poses. They should be able to tell story of the animation in a succinct way. In more advanced animation, I tend to use more key poses than some but this is to retain as much control over the action and it’s timing as possible. In the relatively simple animation of a bouncing box, these are the key poses which I went with:
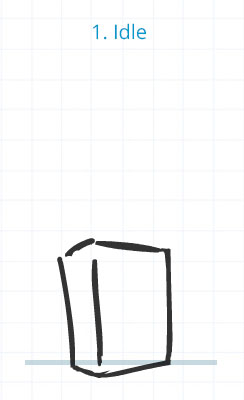

When designing your key poses, simply draw them on consecutive frames in Flash. The second step in this methodology will be to time them out later.
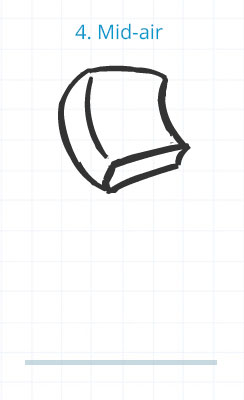
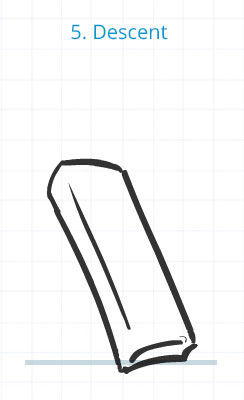
In drawing the key poses, you’ll notice that I’m already thinking about squash and stretch. I know that when the ball goes into the anticipation, there is a great opportunity to get some squash, especially as it will accentuate the ascent’s super stretched frame. This exaggerated squash and stretch pairing can be seen again in the relative squash of the mid-air pose and the stretch of the descent. I know that I want super quick ascents and descents to make a snappy animation. This is why I’ve chosen to super-stretch the ascent and descent poses because they will likely be the only transitional images between the floor and mid air poses. Remember, the fewer the images used to depict a broad movement (i.e. greater spacing of images) the quicker your animation will appear to move. More on this later.
Once you have decided on your key poses for the scene, the next thing to do is to time them out.
TIMING
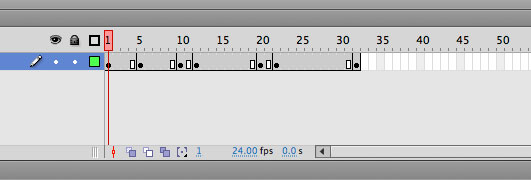
99% of the time my frame rate is at 24fps. If you were in a studio environment, for TV or games, your frame rate may be dictated by the director or the developer. For now we’re going to stick with 24 fps. To adjust the frame rate in Flash, navigate to the bottom of the timeline and simply change the number next to ‘fps’ to 24. Most likely it already will be set at this.
There is no standard timing for a bounce or a jump. It can be as long as you want or need it to be. However, the more you animate, the more you’ll start to intuitively get a feeling for the timing of actions. I start out by simply moving the keyframes along the timeline and playing back the animation. The goal here is just to get a feeling for the timing of the jump in its entirety. If you’ve used the correct keyframes, you should get a sense of the whole jump without any inbetweens. If not, you know you need to add a few more keyframes.

After you’ve spaced out the keyframes and tested the movie a few times, adjust the key poses as necessary for the timing you want to achieve in the jump. Remember the key poses are there as your guides and beats to hit but they aren’t set in stone. It’s perfectly normal to continue to move them a frame or two to the left or right as you progress to inbetweening. However, I encourage you to spend a bit of time on this stage spacing out the keyframes until the animation feels good to you. This is important as this stage has a significant bearing on the success of your finished animation.
INBETWEENS AND SPACING
Now that the hard work has been done, we *could* simply draw equally spaced inbetween drawings between the keyframes we’ve set up. However, this isn’t very interesting and doesn’t mimic the way things move in real life. To take your animation to the next level, we’re going to put to use our knowledge of spacing to get some nice ease-ins and ease-outs.
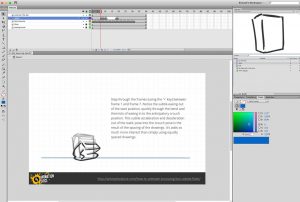
Take for example the 2nd, 3rd and 4th keyframes (anticipation, ascent and mid-air). Taking what we learned from the bouncing ball tutorial, to get some ‘zing’ in our animation, I know I want the box to whiz through the ascent and get to the mid-air fairly quickly. You can see that between the anticipation keyframe and the mid-air key frame there are only 2 frames – a very quick ease-out of the anticipation frame and then instantly into a super stretched frame. This is followed by a lot of frames showing the ease-in to the mid-air keyframe:
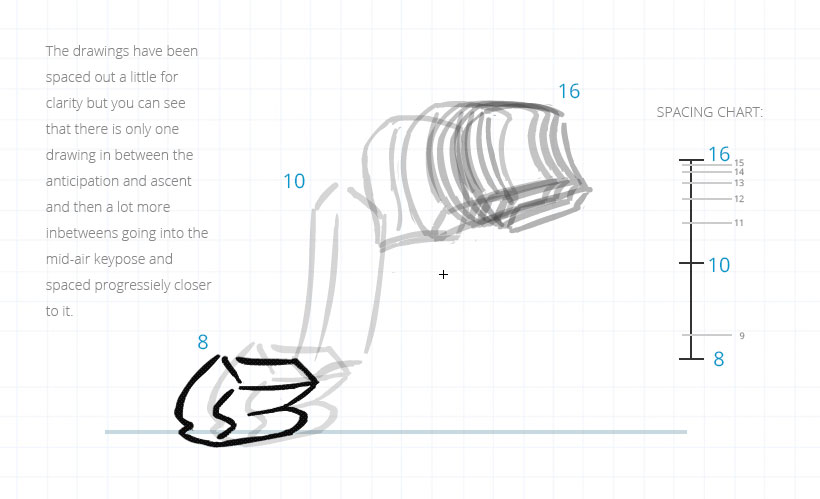
A few things to notice is that I placed the box’s anticipation keyframe on frame 5 in the timing out stage. However, as you can see above, the box doesn’t begin to move out of that anticipation pose until frame 8. Between frame 5 and 8 I added a little bit more squash to the box. This is because when I was adding the inbetweens, I felt it needed a few frames more anticipation frames. Similarly, I added more cushioning frames before I hit my mid-air – defined in the keyframing stage – and hence pushing it along a bit from frame 13 to 16, as shown above.
In the resource file, you’ll notice that this spacing is echoed quite similarly for the descent.
As I mentioned in in the keyframing stage, the single image ascent and descent frames leads to zippy, snappy animation but requires a bit more cushioning on either side of the action to help the eye register what’s happening. This is always great to remember as it will give your animation a good pacing but remain easy and pleasant to watch and understand.
SUMMARY
Using the bouncing box example turns the complexity up by one notch. It requires us to think more in 3-dimensions and understand how squash and stretch can be applied to 3D forms whilst retaining their volume and structural integrity.
The methodology described here is the foundation for successful animation, whether pen on paper, or in the computer. Plan your key poses! I’ve been using the term key poses and keyframes interchangeably in this post but whatever you’d like to call them, they are the most important part of this methodology. They are the frames that tell the story without the need for inbetweens. Remember to draw your keyframes on consecutive frames for now and then once happy with them begin spacing them out to figure out what sort of timing you want.
Once you’re happy with the timing of your keyframes, the final step is add your inbetweens. Straight inbetweens are OK but boring and will leave your animation somewhat lack-lustre. Adding interesting and appropriate spacing of your inbetweens creates nice easing, something which is a natural part of real movement and will take your animation to the next level.
Never miss out on new tutorials, products or reviews. No spam, we promise.