OVERVIEW
Level: BEGINNER |
In this tutorial, we’ll start to look at acting in animation. A lot of walks are built using the same type of key poses but the look of those key poses is dictated by the character’s emotional state . It’s important to spend the time to get inside the head of the character and feel for ourselves what’s going on. To make things slightly easier however, there are universal physiological states associated with particular emotions which we’ll identify and explore in more detail.

#009: How To Animate A Sad Flour Sack Walk – Resource Files
£3.99WHY A SAD WALK?
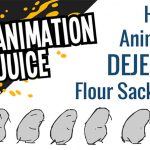
In the last tutorial, we looked at a more conventional, if slightly upbeat, walk cycle. But of course, it’s likely at some point you’re going to want to show the character exuding a different emotional state. In this example, we’re going to look at a sad walk cycle using our friend the flour sack. But it doesn’t really matter the emotion (or character), the structure to build the walk is much the same for any walk.
Remember that in a walk, courtesy of Richard Williams, we have named key poses that are helpful to establish first in order to build the walk. The main difference in different emotional walks is obviously going to be our acting choices and how they change the physicality of the character in these key poses.
ACTING CHOICES
For me, the acting choices really stem from an awareness of two things: the emotional state of the character and the physicality of the character. Let’s look at each in turn.
EMOTIONAL STATE
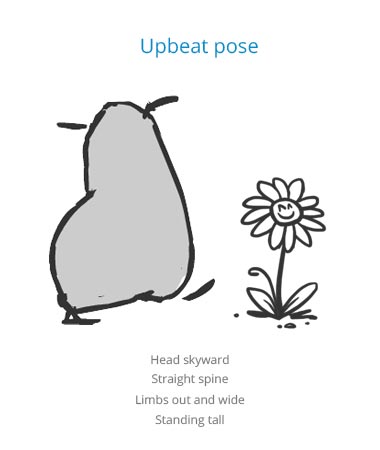
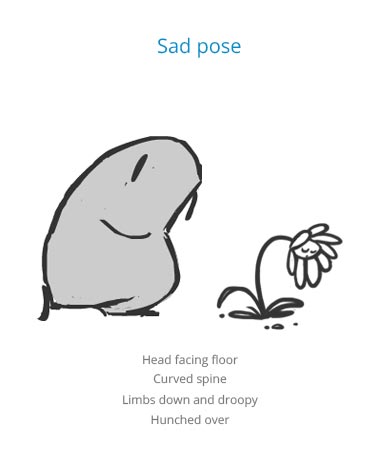
There are certain trademarks of sadness. Low energy, loose limbs, lethargy. We also often look at the floor, hunch over and generally have a low energy state. In my head, when I think about the traits of sadness, the image of a wilting flower comes to mind. Floppy stem, head looking at the floor and all the petals drooping likewise. Contrast this with a flower in the height of summer, stem tall and proud, head skyward and all petals at arms length welcoming the warm rays of the sun.

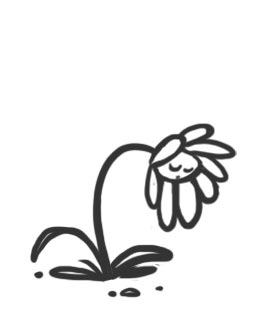
Creating analogies like this may help you pin point some of the key features of a particular emotional state and begin thinking how this emotional state manifests in the physicality of the creature (flower, flour sack or human etc)
PHYSICALITY
Like the flower example above, the manifestation of the emotional state – droopy, floppy, downward facing etc – is the physical effect of the emotion. In our case, our flour sack is very bottom heavy with short stubby limbs but we can still hunch him over, hang his arms and make him look face downward.
The floppiness of the feet for example mean that much of the foot is lead by the downturned toes before only briefly getting the heel to touch the floor. This is in contrast to a much more jaunty walk (like the last tutorial) where much of the step is lead by the heel. Do it yourself and you can feel that there is much more tension in the foot to lead most of the step with the heel than with the toes. You really have to relax the foot to get this to happen.
Another example of the manifestation of the emotion is in the timing. A sad walk is obviously much slower than happy or even neutral walk. We can address this by simply adding more frames between our key poses.
KEY POSES & TIMING
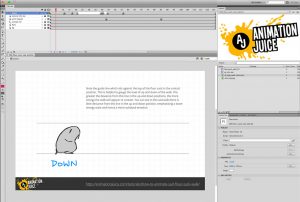
After getting into the head and body of the character as outlined above, it’s time to start creating all the key poses for the walk. These are the key poses I ended up using for this walk, complete with the timing of the frames:

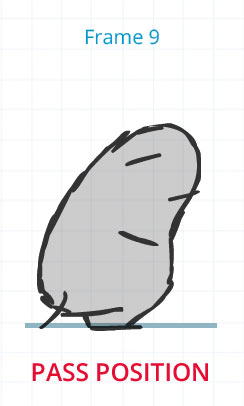
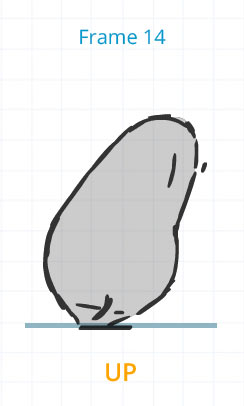
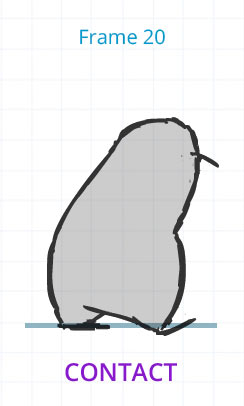
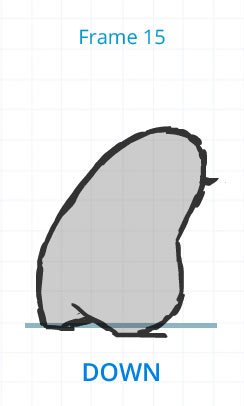
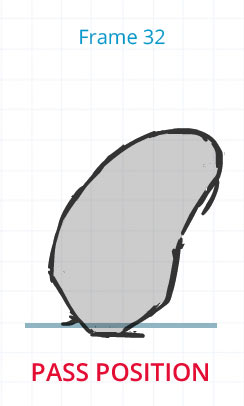
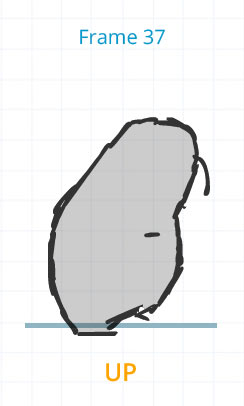
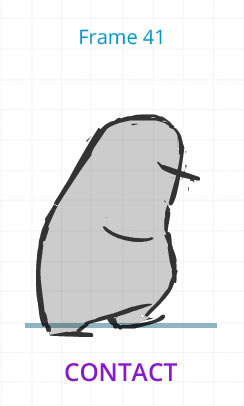
One thing to notice is how the up and down positions don’t deviate much from the passing position. Look at our other walk cycle of the flour sack in the previous tutorial to see that in a more energetic walk, there is more up and down of the walk.
TIMING TIP
As I said above, most sad movements, tend to be slower. And to do this we obviously add more frames between the key poses. However, if you want to play around with subtle differences in the speed of the walk, it can be a slow process retiming out the key poses each time.
So to speed things up when planning my key poses and timing, I tend to keep my key poses on consecutive frames and manipulate the frame rate instead.
Most animation programs by default will play back your animation at 24fps. So by reducing this we can instantly start to see what our animation will look like at a slower timing. For instance, in the video, you will note that I ended up playing back the animation at 4fps. You could switch this up to slightly faster, say 6fps or even less. Once you’re happy with the timing, whack the frame rate back up to 24fps and space the drawings out accordingly.
If this sounds a bit confusing, hopefully the example below will clarify things:
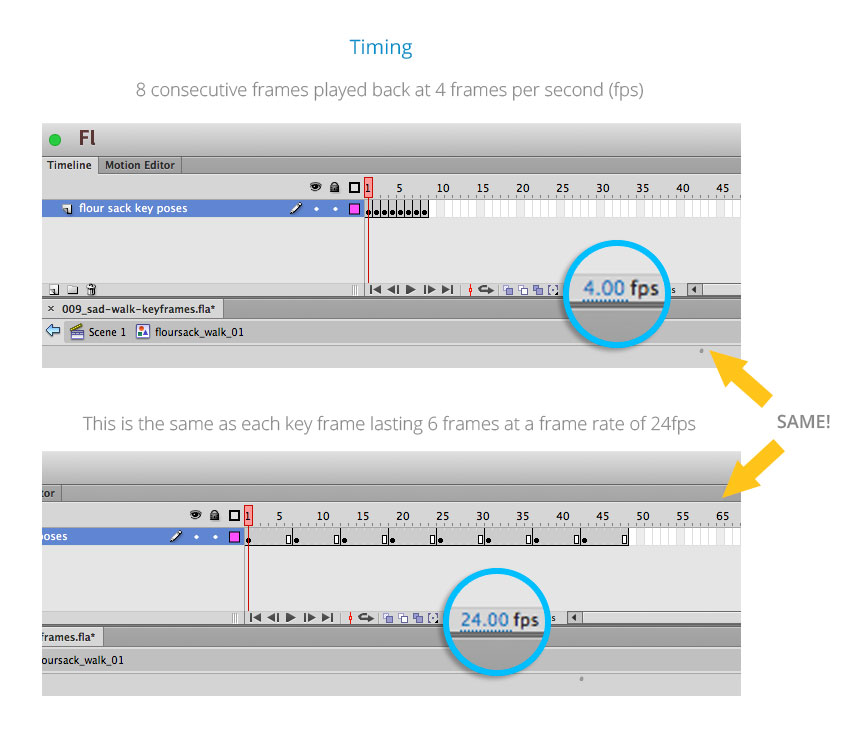
The point is you can experiment with the different timings much more quickly this way than by keeping the frame rate at 24fps and re-spacing the key frames each time.
INBETWEENING
As always, this is the easy bit so long as you have really spent the timing planning your key poses and timing! Adding the inbetweens is now just a case of filling in the gaps. It takes the most amount of time but it’s not as mind intensive as the previous stage.
The only thing to think about (and this is important) is the spacing of your drawings. Actually, in this walk, because he’s quite sad, I think a lot of the inbetweens are quite evenly spaced. In this case, less contrast in the spacing of the inbetweens helps to give a sense of monotony that emphasises the sad emotion but which in other actions would dull the movement.
You can read more in depth about spacing of your inbetweens in this tutorial.
SUMMARY
The basic methodology of constructing a walk is pretty much the same regardless of the walk. The differences are in the acting choices. As discussed, a sad walk is characterised by:
- floppier limbs
- hunched over spine
- looking at the floor
- slower timing for each step
- not much difference in height between up and down positions
- overall feeling of heaviness, like the character is literally carrying the weight of the world on their shoulders.
This doesn’t take a degree in behavioural psychology to figure out. In fact, intellectualising seems a waste of time. My advice is to FEEL it. Turn off the music, shut the door and really feel yourself as the character, in both emotion and physicality. By doing this you will get a much faster idea about the key poses to draw and they will be more authentic and believable than simply intellectualising alone.
Remember, to experiment with the timing of the animation at the early stage by keeping your keyframes on consecutive frames and adjusting the frame rate of the timeline. This is a quick way to get a feel for different speeds of walk and how the different speeds connote different emotional states.
If you want more information on the theory of constructing walks, I highly recommend Richard William’s fantastic book: ‘The Animator’s Survival Kit. It features exhaustive discussions on walks and many other functional movements like runs, jumps, sneaks etc. As you forge your career in animation, this book will be your lifetime companion! For more info on it, see our full review of the book.
The Animator's Survival Kit
![]() (91%)
(91%)
This book is packed full of the secrets of the old master animators, which Williams apprenticed under. Beginner to expert, this book is relevant to all life-long students of animation - an essential part of any animators library!
Never miss out on new tutorials, products or reviews. No spam, we promise.